Settings
Settings is where you control personal account information, security, notifications, and the default behavior of Ration modules. Changes in a settings page take effect after you select that page's save action.
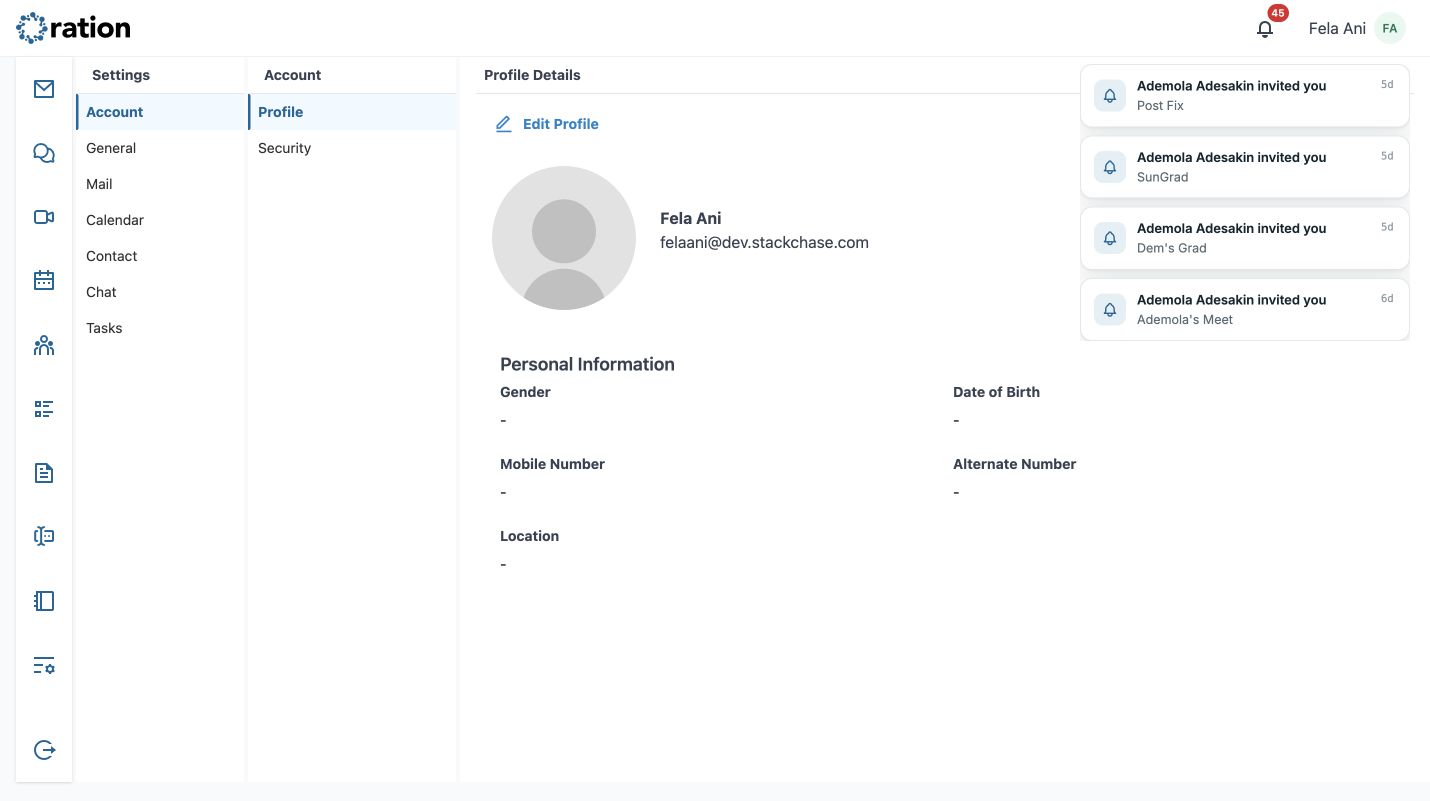
Navigate Settings
The desktop Settings workspace has a category sidebar and a settings pane. Select a category, then a section within it:
| Category | Sections |
|---|---|
| Account | Profile and Security |
| General | Language & Region, Notification, and Software |
| Signature, Filter, and Auto Reply | |
| Calendar | Preferences |
| Contact | Preferences |
| Chat | Preferences |
| Tasks | Preferences |
Account
Profile
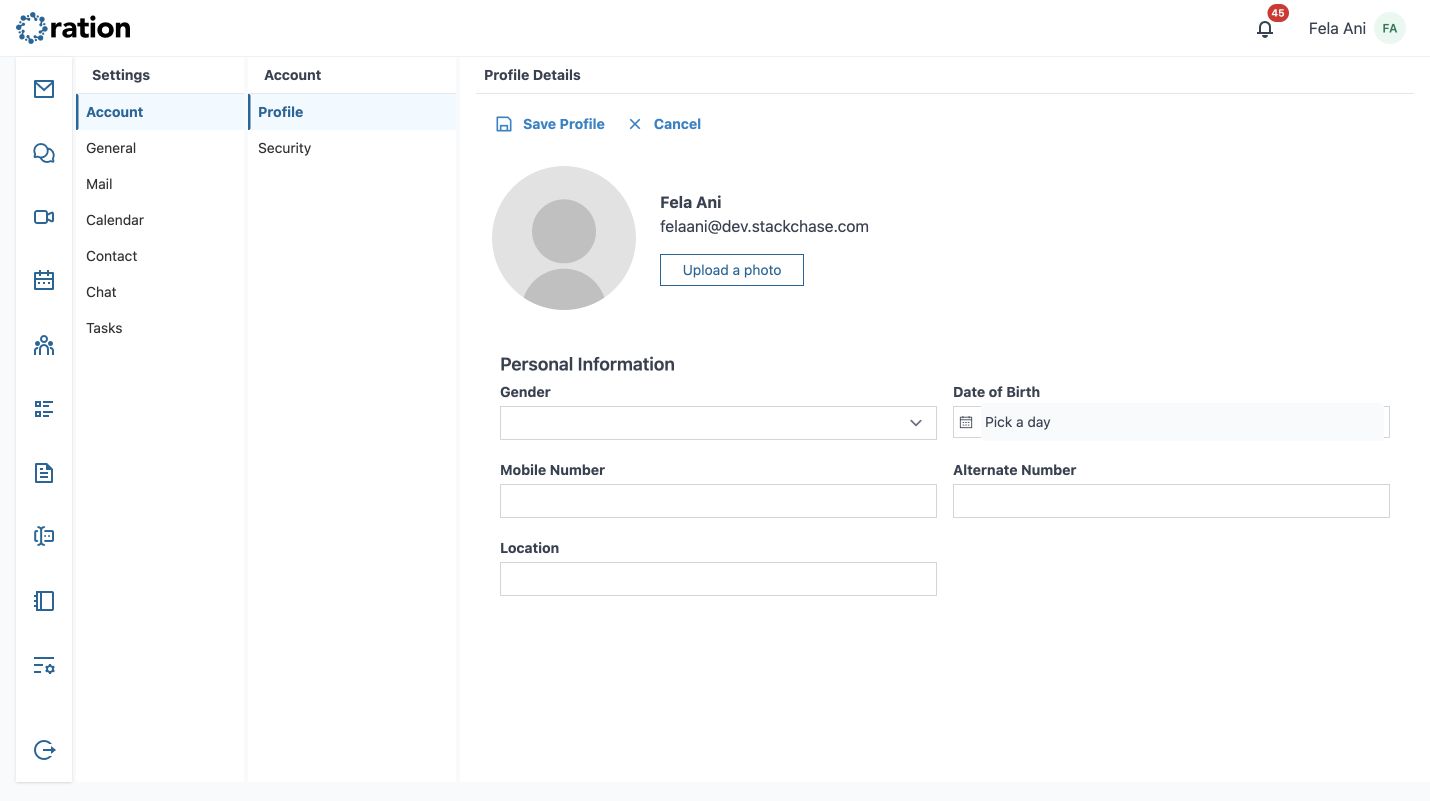
Select Account then Profile to review your name, email address, and personal information. Choose Edit Profile to update your display information, profile photo, gender, date of birth, phone numbers, and location. Select Save Profile to apply changes or Cancel to discard the edit.
Security
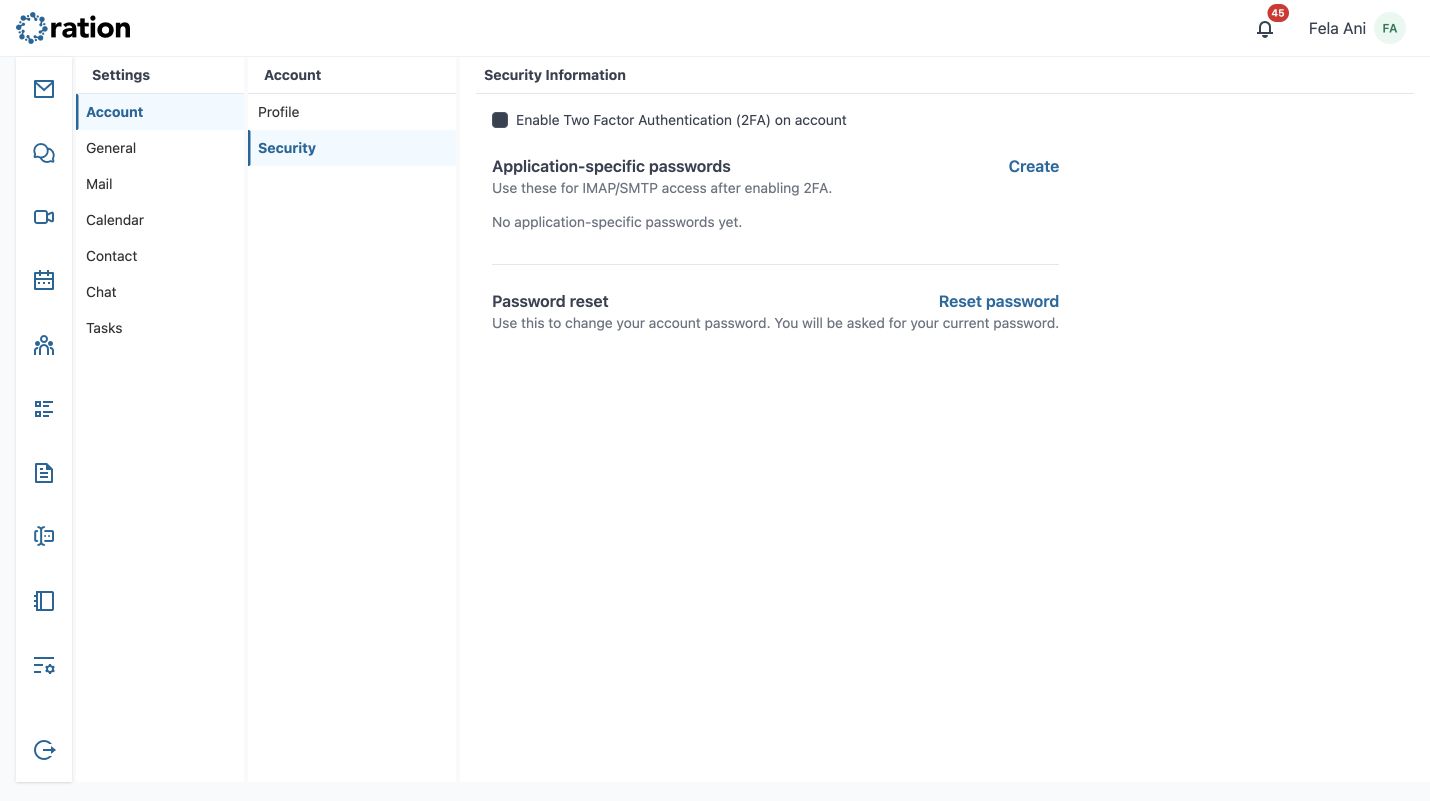
Select Security to manage account protection:
- Enable Two Factor Authentication (2FA) to add a verification step when signing in. Ration uses 2FAS for this setup. The TOTP Authentication screen opens: in 2FAS, scan its QR code (or enter the setup key if scanning is unavailable), enter the current 2FAS code in Token, then select Verify Token to finish enabling 2FA.
- Enabling 2FA signs you out immediately. Sign in again with your usual Ration password and the current time-based token from 2FAS. Subsequent interactive web and mobile sign-ins require both. Never share the QR code, setup key, or a generated token; they can be used to authenticate as you.
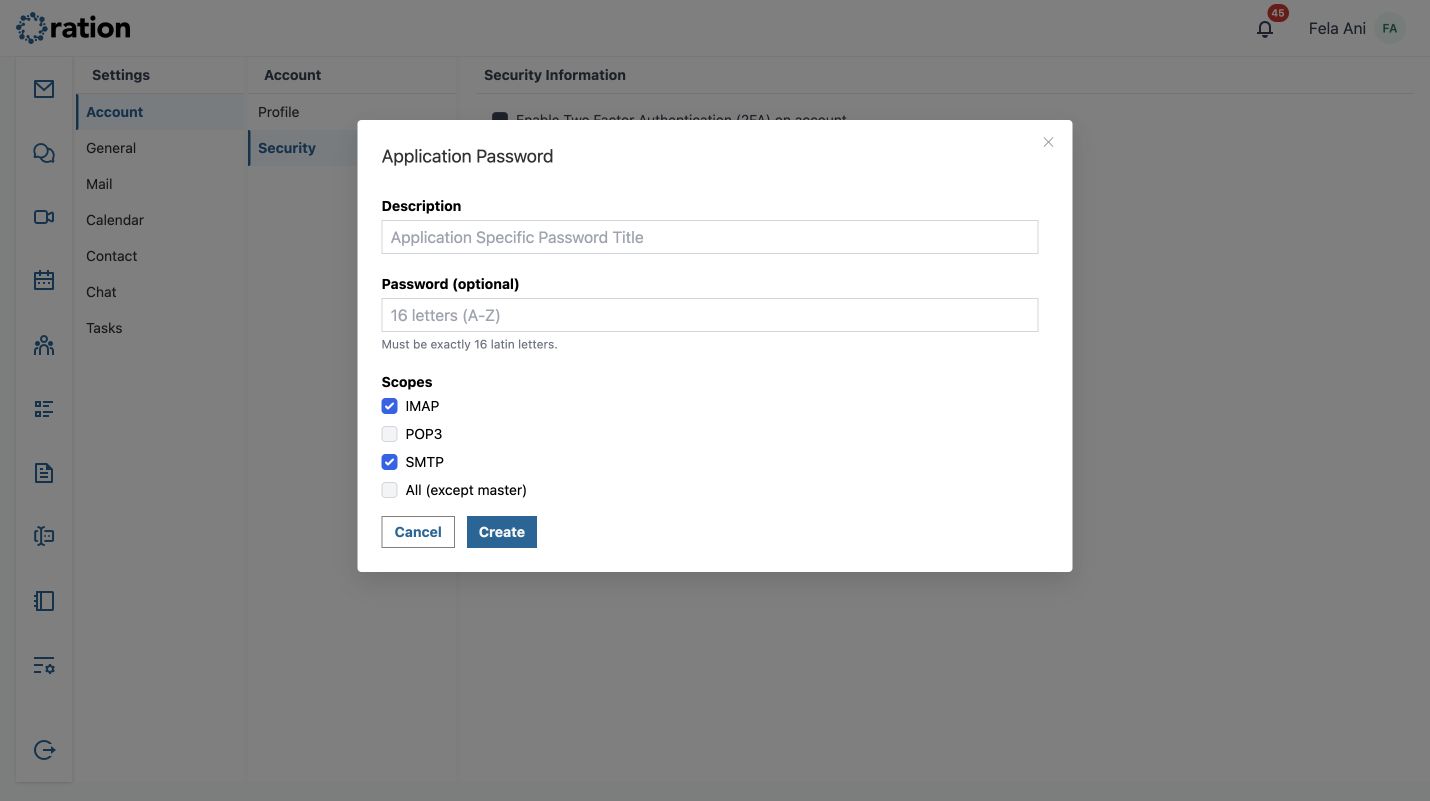
- Use Application-specific passwords to create credentials for IMAP/SMTP clients after 2FA is enabled. Select Create, add a recognisable description, optionally supply a 16-letter password, and select the IMAP, POP3, SMTP, or All (except master) scopes. Treat each generated password like a password: use one per client and delete it when that client no longer needs access.
- Select Reset password, enter the current password, the new password, and its confirmation, then select Submit. Cancel closes the reset form without changing anything.
Sign in with a token
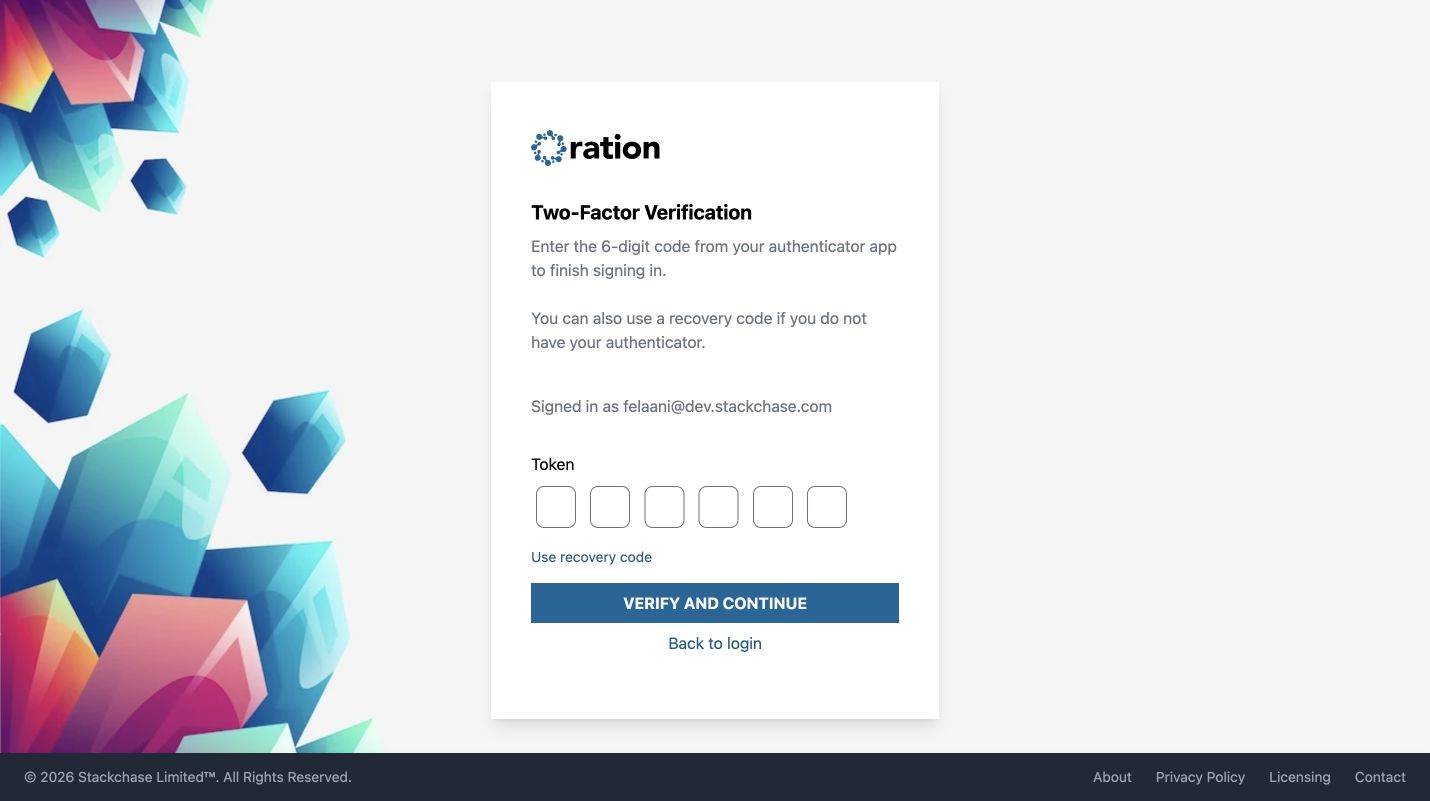
After you enter your Ration email address and password, the Two-Factor Verification page requests the six-digit code from your authenticator. Enter the current code and select Verify and continue. If you cannot access the authenticator, select Use recovery code and provide a recovery code instead; Back to login returns to the password screen.
After 2FA is enabled, an IMAP or SMTP client must authenticate with an application-specific password created in Ration; the account’s normal sign-in password will no longer work for that client. Create a scoped app password first, update the client using your Ration email address and that app password, and only then remove any old saved password. A TOTP code is for an interactive Ration sign-in—it is not the password to enter in an IMAP/SMTP client.
Choose and set up a TOTP authenticator
Ration is tested against 2FAS, which is the recommended client. Install 2FAS before enabling 2FA, add the Ration account by scanning the QR code on the TOTP Authentication screen, then use its rotating code to verify setup and to complete future Ration sign-ins.
Ration uses standard time-based one-time passwords (TOTP), so other compatible authenticators can also be used. Common alternatives include Google Authenticator, Microsoft Authenticator, and Apple’s Passwords app on supported Apple devices. The code generator can work without a mobile-data connection.
Keep your chosen authenticator on a device you control and make sure its time is set automatically. Before replacing or resetting that device, move or re-enrol the Ration entry so that you do not lose access to the codes needed for subsequent sign-ins.
General preferences
Language and region
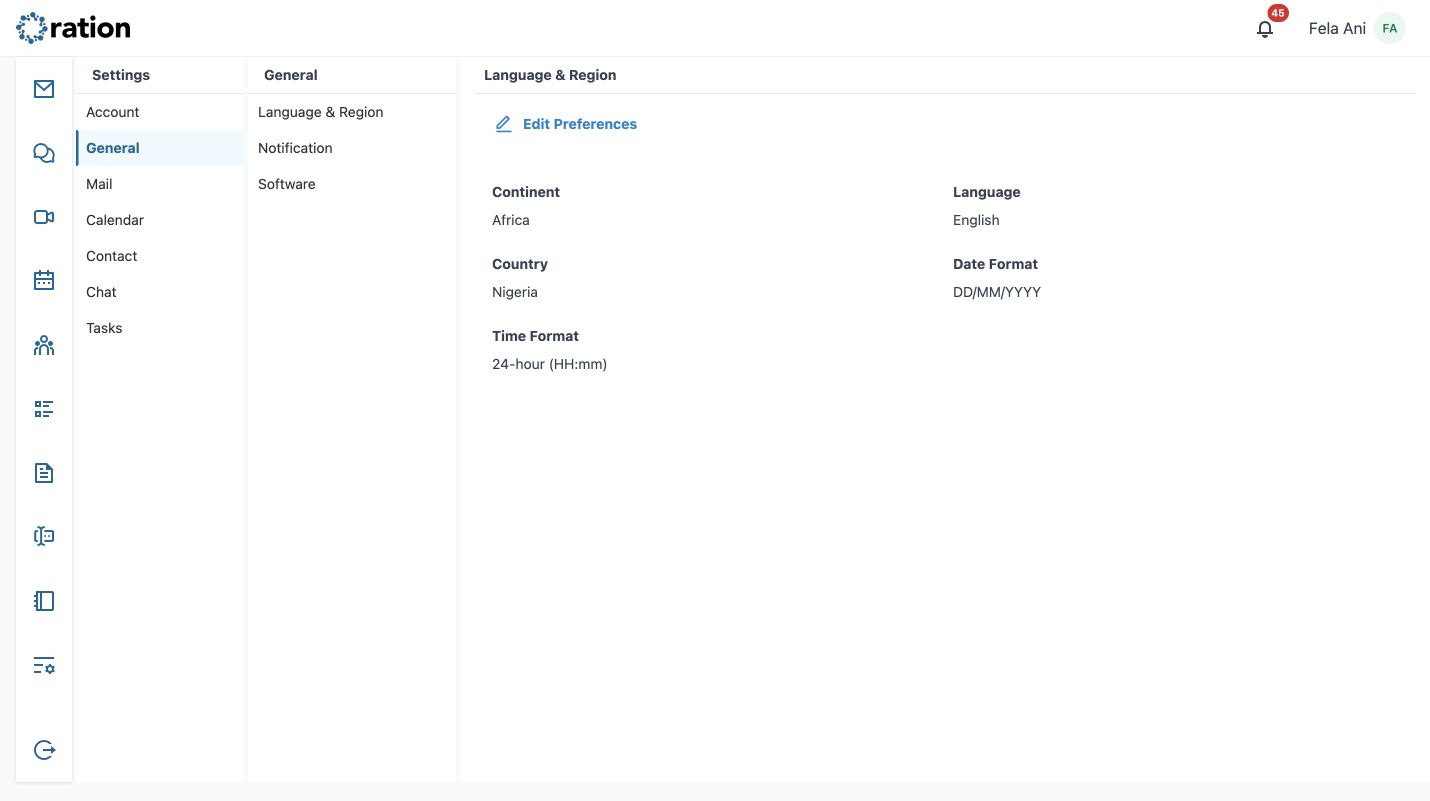
Select Edit Preferences to change the continent, language, country, date format, and time format that Ration uses when presenting information. Select Save Preferences when finished.
Notifications
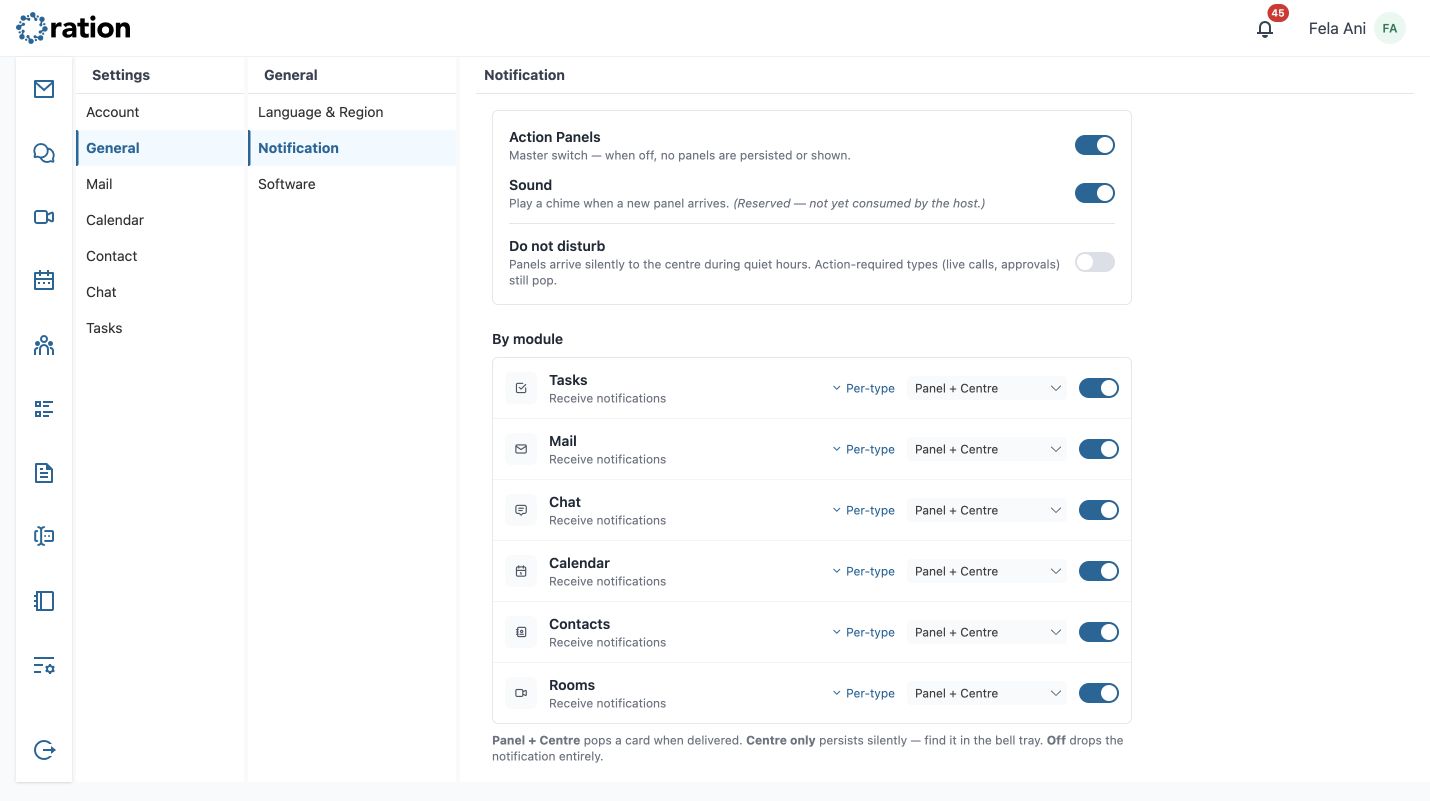
Notification preferences control how the action panel and notification centre handle activity from Tasks, Mail, Chat, Calendar, Contacts, and Rooms.
- The Action Panels master switch disables all panel persistence and display when turned off.
- Sound controls the chime for a new panel.
- Do not disturb sends panels quietly to the notification centre during quiet hours; action-required items such as live calls and approvals can still surface.
- Set each module to Panel + Centre, Centre only, or Off. Panel + Centre shows a card and saves it to the bell tray; Centre only saves it silently; Off drops that notification.
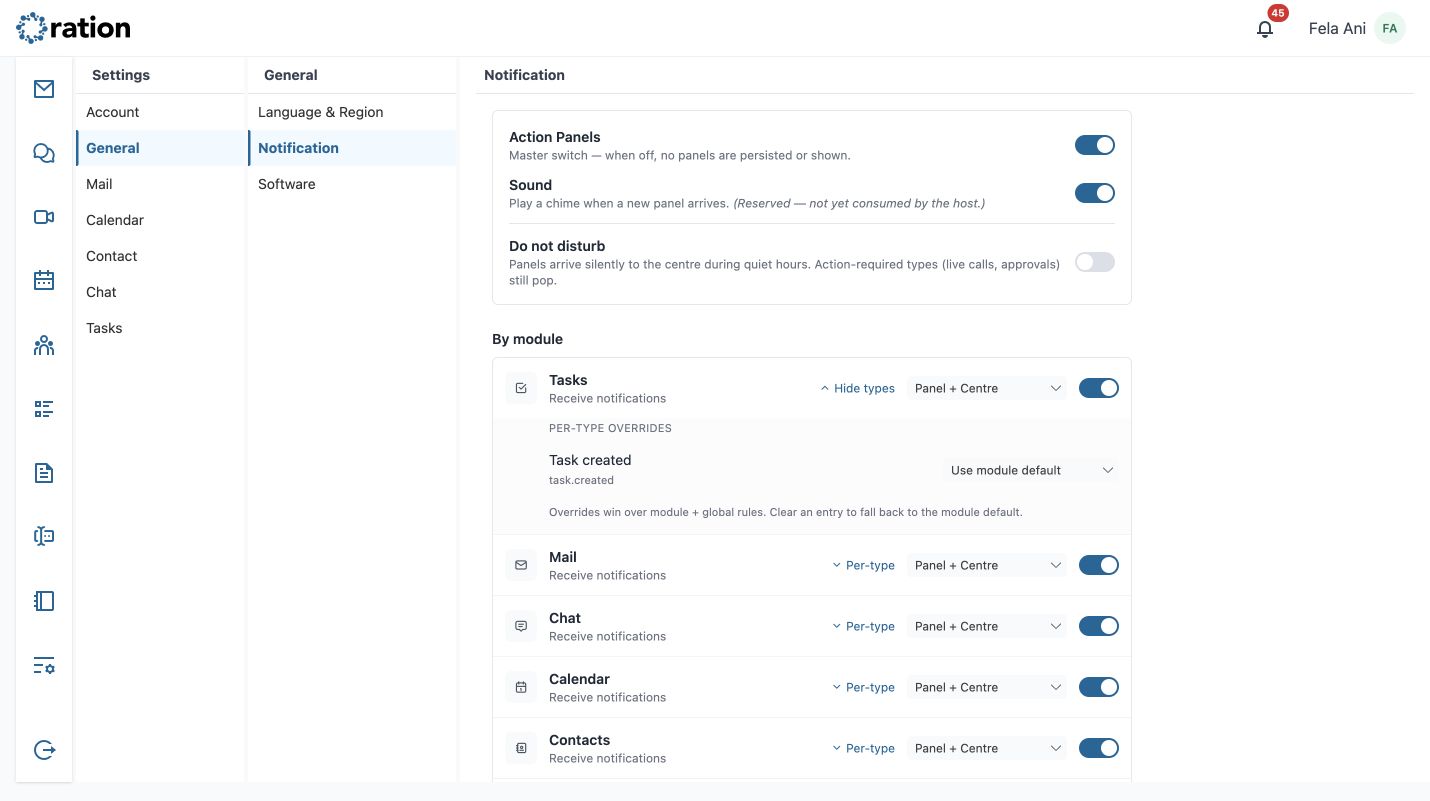
- Select Per-type beside a module to override an individual event type. A per-type rule wins over the module and global rule; clear it to return to the module default. Critical events are marked in the editor and cannot be fully silenced unless the entire module is off.
- Select Save preferences to keep changes, or Reset to defaults to restore the standard notification choices.
Software
The Software section displays the installed Ration version, which is useful information when asking for support.
Mail settings
Signatures
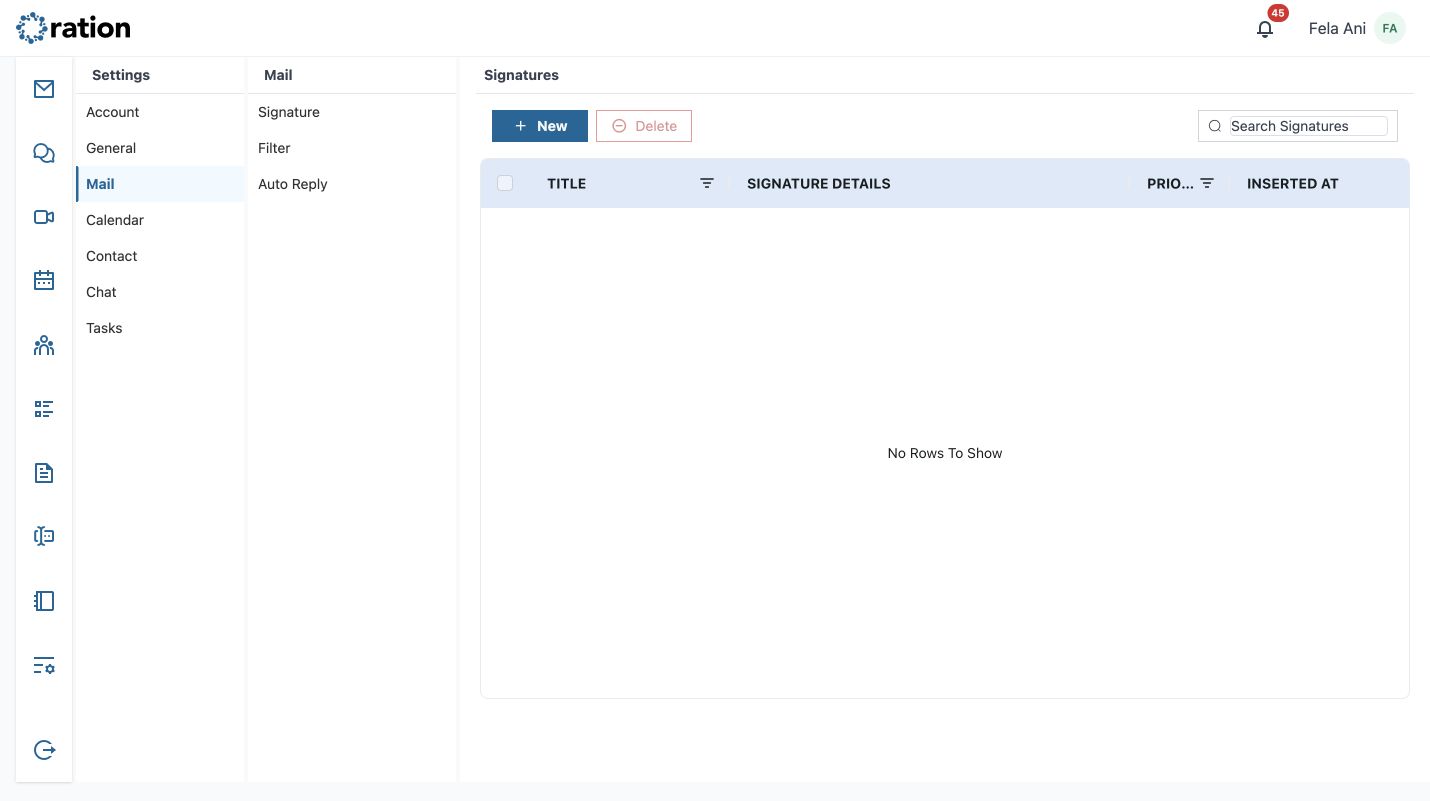
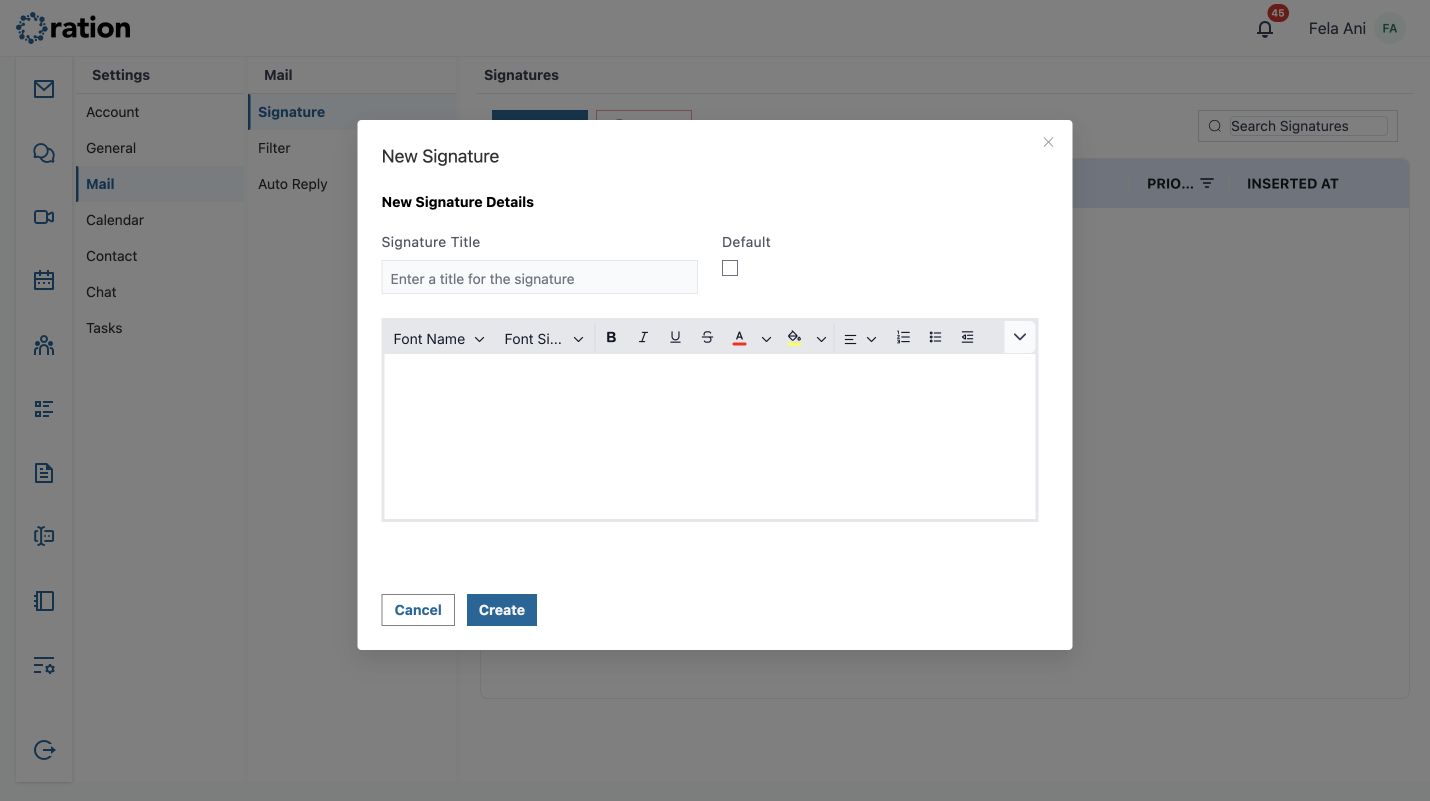
The Signature list shows title, signature details, priority, insertion date, and actions. Use search to find a signature, select rows for bulk Delete, or choose New to provide a title, decide whether it is the default, and format the signature body with the editor controls. Saved signatures can be viewed, edited, deleted, or made the default from their row actions.
Filters
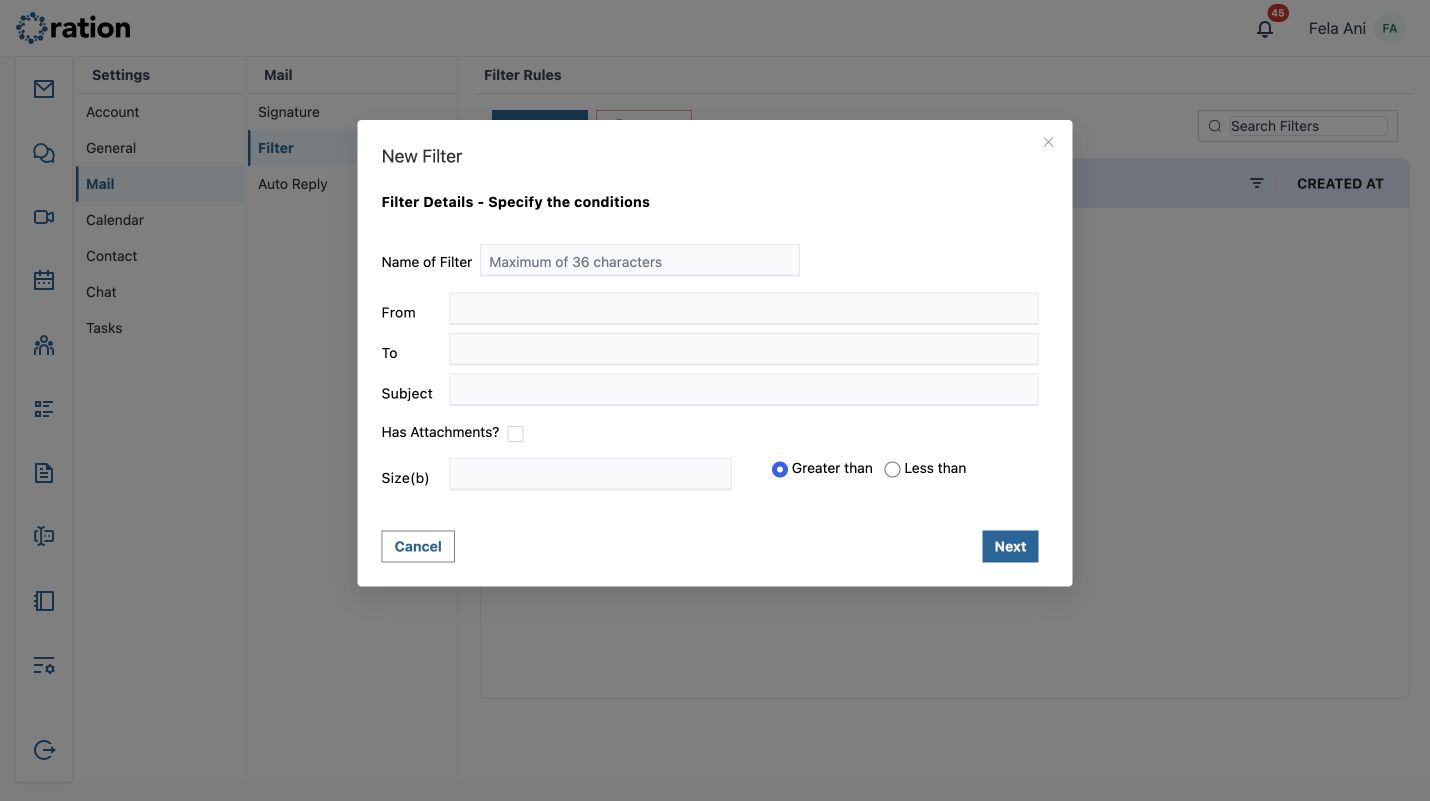
The Filter list supports search, selected-row deletion, and pagination when the list is long. Select New to use the two-step rule builder:
- Give the rule a name and add one or more conditions: From, To, Subject, Has Attachments, or message size in bytes (greater than or less than a value).
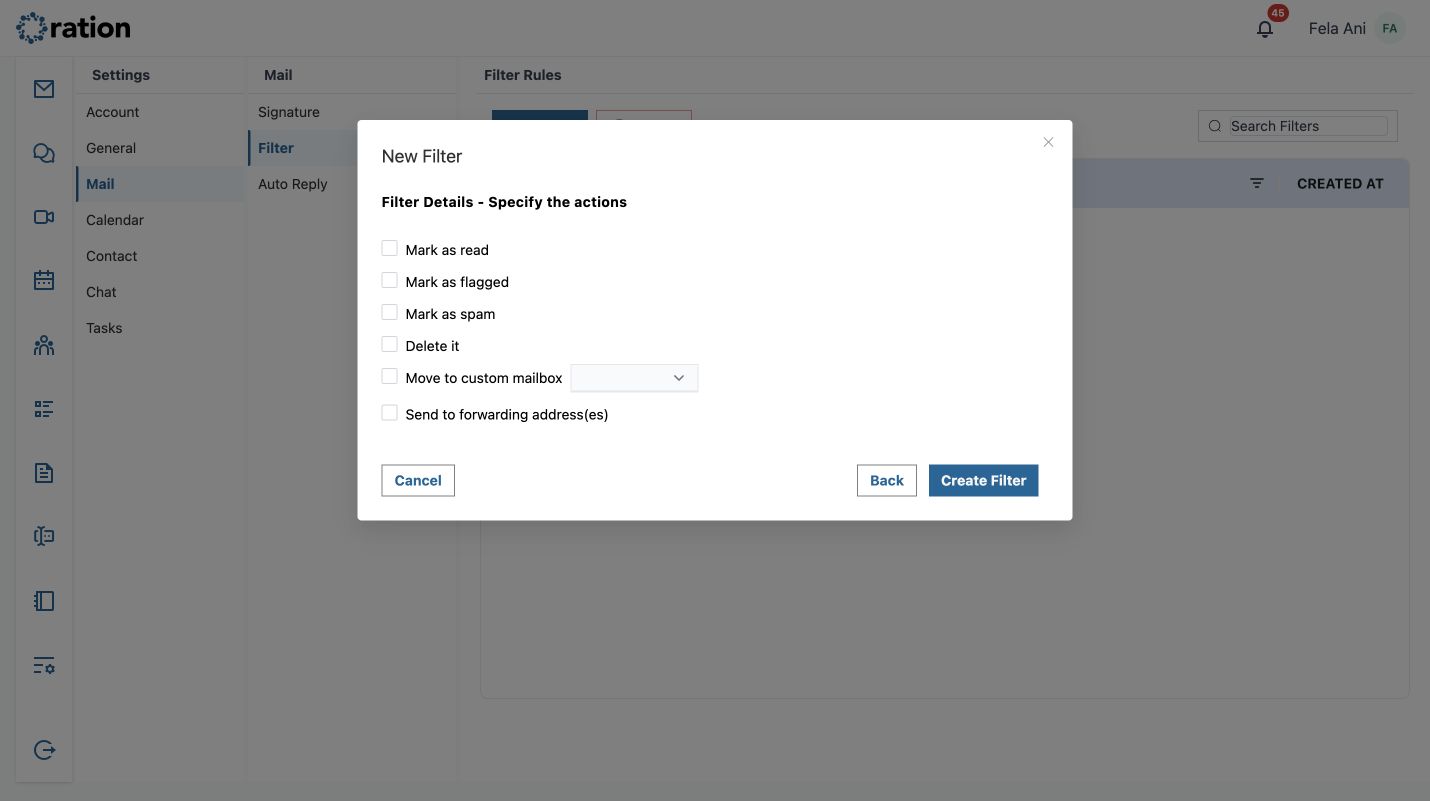
- Select Next and choose the action: mark as read, flag, mark as spam, delete, move to a custom mailbox, or forward to one or more email, MX, or POST URL destinations.
- Select Create Filter to save, Back to revise conditions, or Cancel to discard the draft.
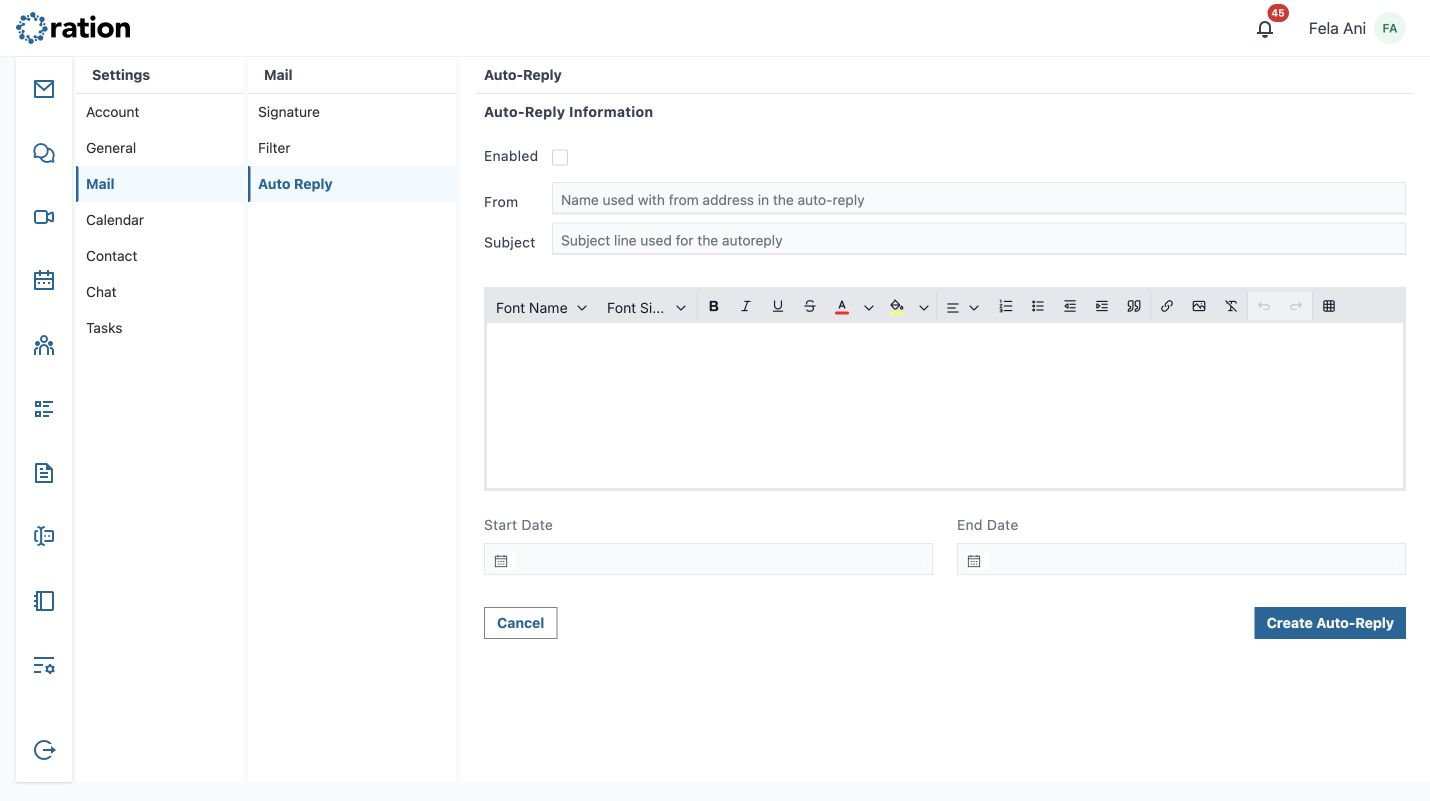
Auto Reply
The Auto Reply screen shows the active configuration, or Create Auto-Reply when one has not been configured. In the editor, set Enabled, sender name, subject, formatted reply message, start date, and end date. Select Create Auto-Reply to activate the configuration; afterwards, the command changes to Edit Auto-Reply. Cancel leaves the existing state unchanged.
Module defaults
These preferences change the defaults for future work; they do not rewrite existing events, contacts, conversations, or tasks.
Calendar
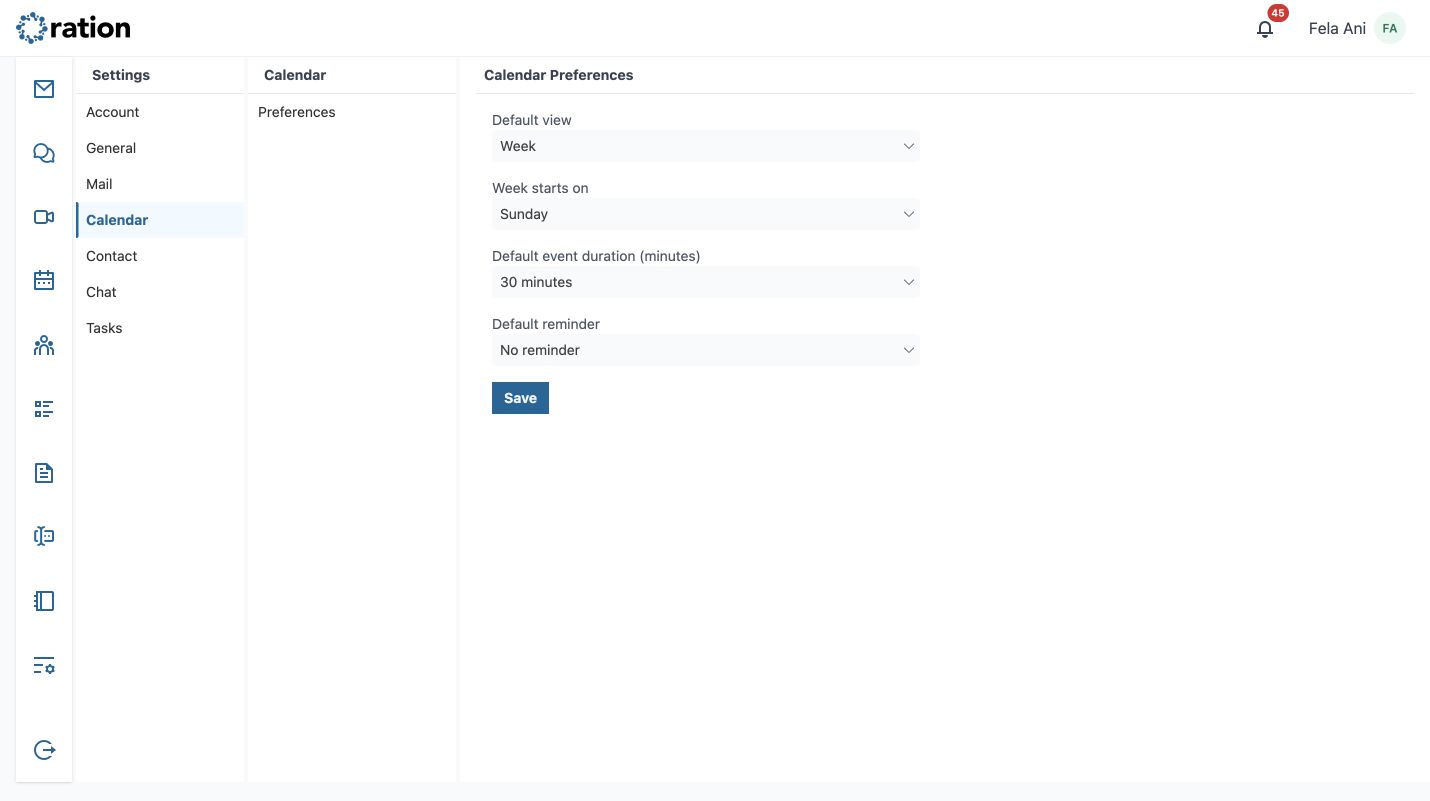
Choose the default calendar view (Month, Week, or Day), first day of the week (Sunday, Monday, or Saturday), default event duration (15, 30, 45, or 60 minutes), and default reminder (none, at event time, 5, 15, or 30 minutes before, or one hour before). Select Save to apply the defaults to new Calendar sessions and events.
Contacts
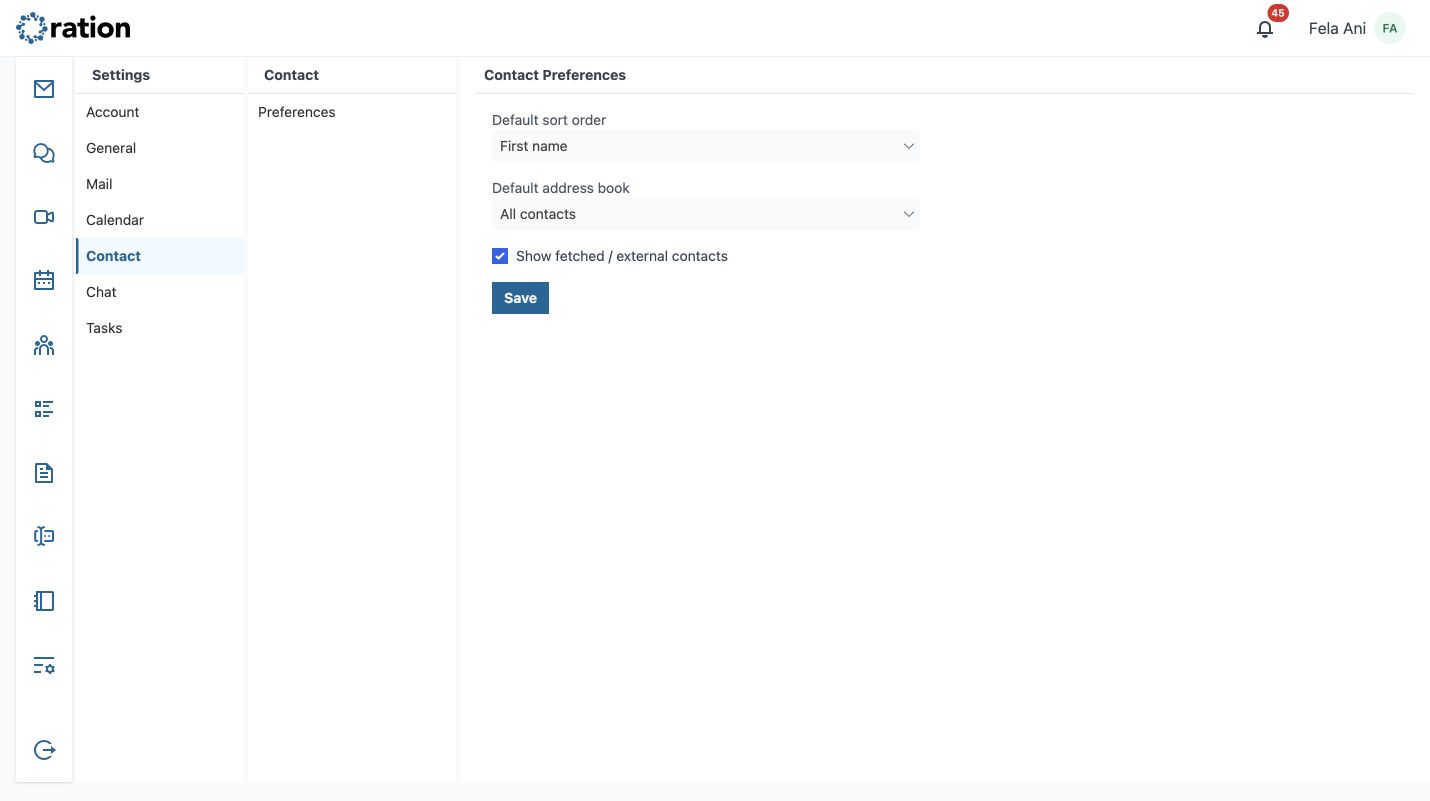
Set the default contact sort order (First name, Last name, or Recently added), default address book (All contacts, Personal, or Organization directory), and whether fetched or external contacts are shown. Select Save to apply the preference.
Chat
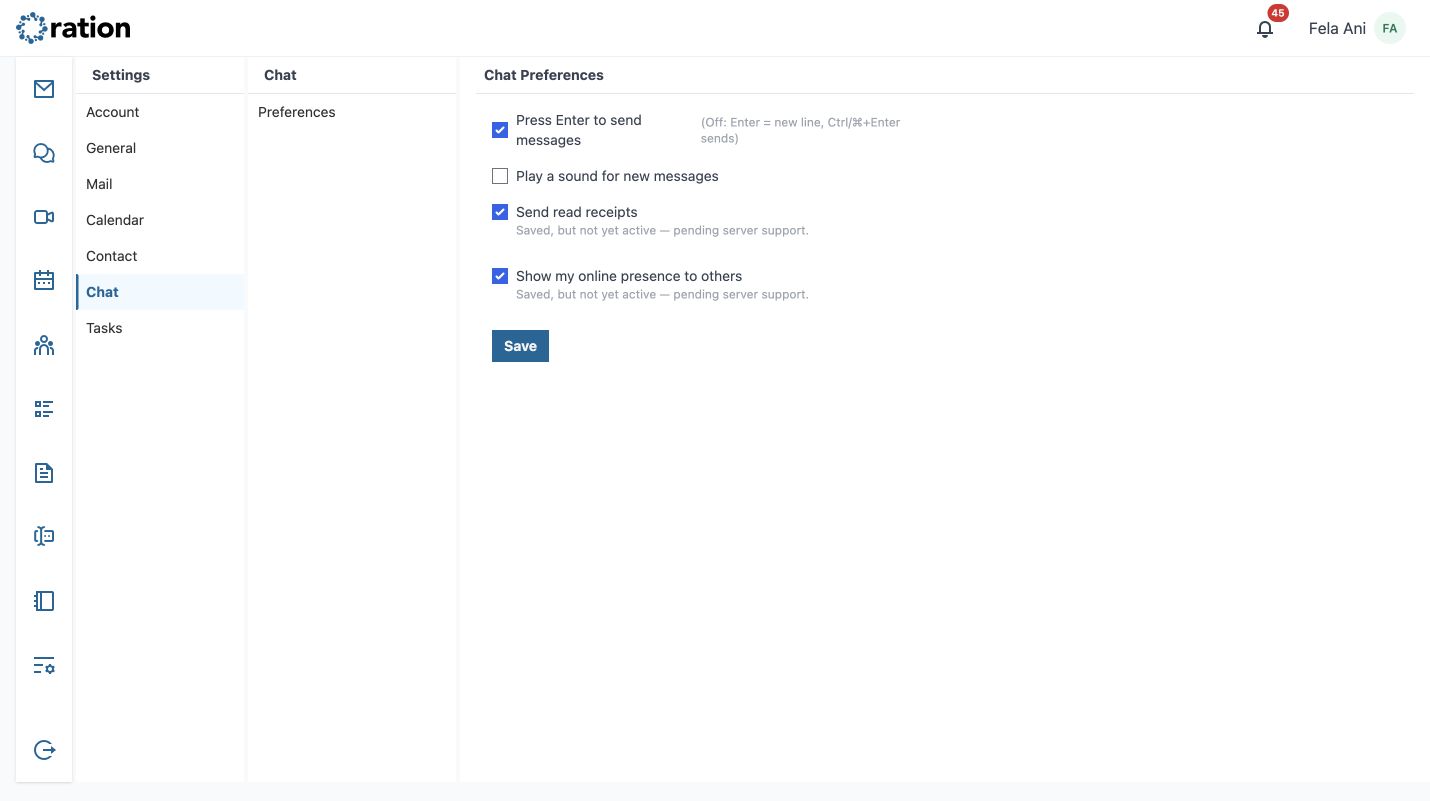
Configure whether Enter sends a message (otherwise it adds a line, with Ctrl/⌘+Enter used to send), whether new messages play a sound, read receipts, and your visible online presence. The screen identifies any preferences that are saved but pending server support. Select Save after changing available controls.
Tasks
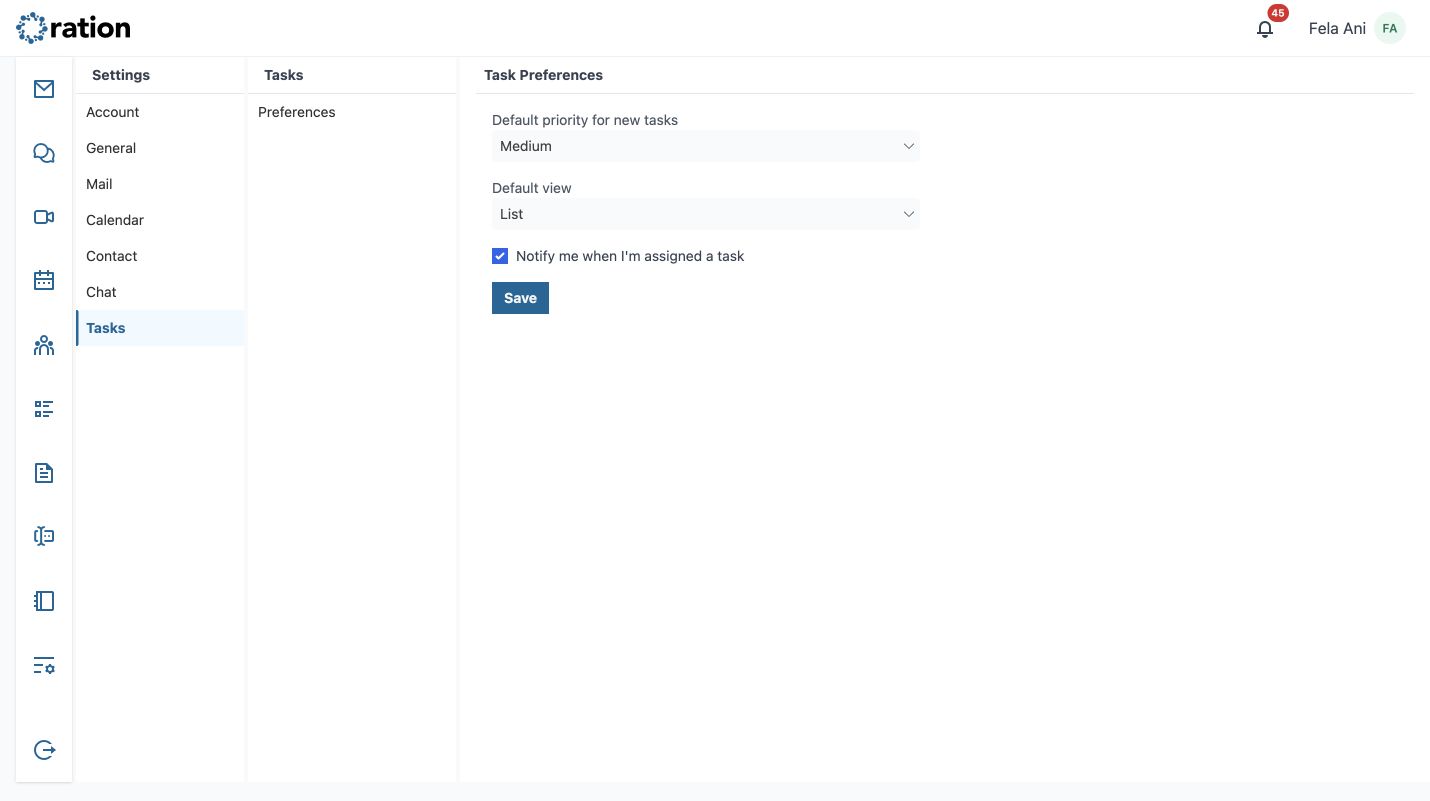
Choose the default priority for new tasks (Low, Medium, High, or Urgent), default task view (List, Board, Dashboard, or My Day), and whether you are notified when someone assigns a task to you. Select Save to keep the new defaults.
Whenever you enable 2FA, reset your password, or stop using an email client, revisit Security and remove application-specific passwords that are no longer needed.