Register your organisation
Open https://app.ration.works/register to create a new Ration organisation. Registration is an administrator onboarding flow for your business domain—not a self-service user-profile form. It has four steps: Account, Domain, 2FA, and Plan.
/register is available for Ration SaaS at app.ration.works and for MSP-hosted Ration at the hostname supplied by the provider. MSPs use this flow to onboard their customers. Standalone on-premises installations do not provide self-service organisation registration; follow the onboarding process supplied by your administrator instead.
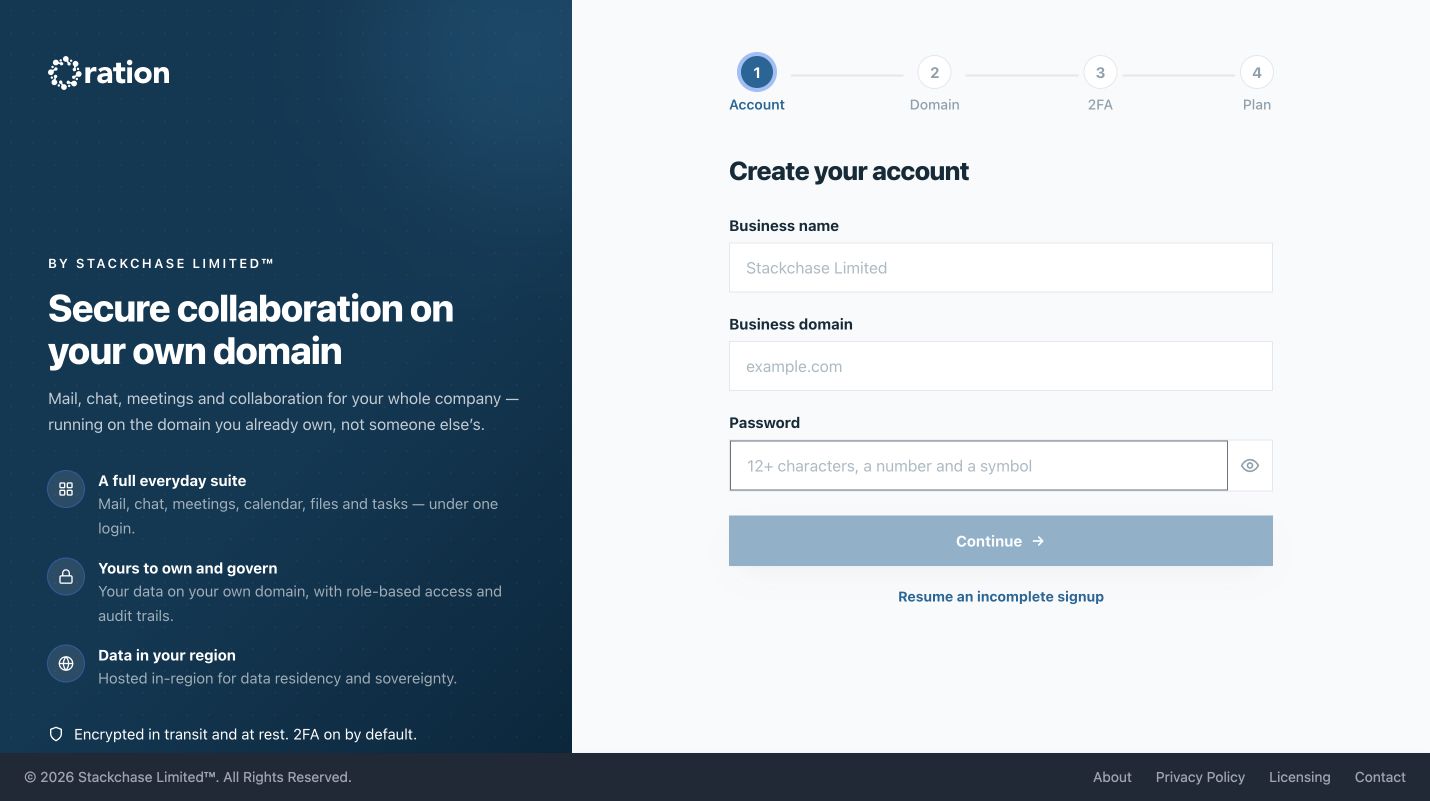
1. Create the organisation account
Enter:
- Business name
- Business domain (for example,
example.com) - A password of at least 12 characters that includes a number and symbol
Select Continue. If you started registration earlier, select Resume an incomplete signup, enter the business domain, and complete the requested proof—password or six-digit 2FA code—to continue from the saved stage.
The registration password must be at least 12 characters long and include at least one number and one supported symbol: ! ? @ # $ % ^ & * _. The Continue button remains unavailable until the business name, valid domain, and password meet these requirements.
Resume an incomplete registration
If payment is not completed, return to https://app.ration.works/register and select Resume an incomplete signup. Enter the organisation’s Business domain and select Continue. Ration returns the administrator to the QR-based 2FA verification step so they can prove access to the in-progress registration, then continue through plan, billing, and payment.
Keep the organisation’s authenticator available when resuming. If Ration requests a password or six-digit 2FA code as part of the verification, use the credentials created during the original registration.
2. Verify the business domain
Ration generates a DNS verification record for the business domain. Add the displayed TXT host and value at your domain provider, then select Check verification.
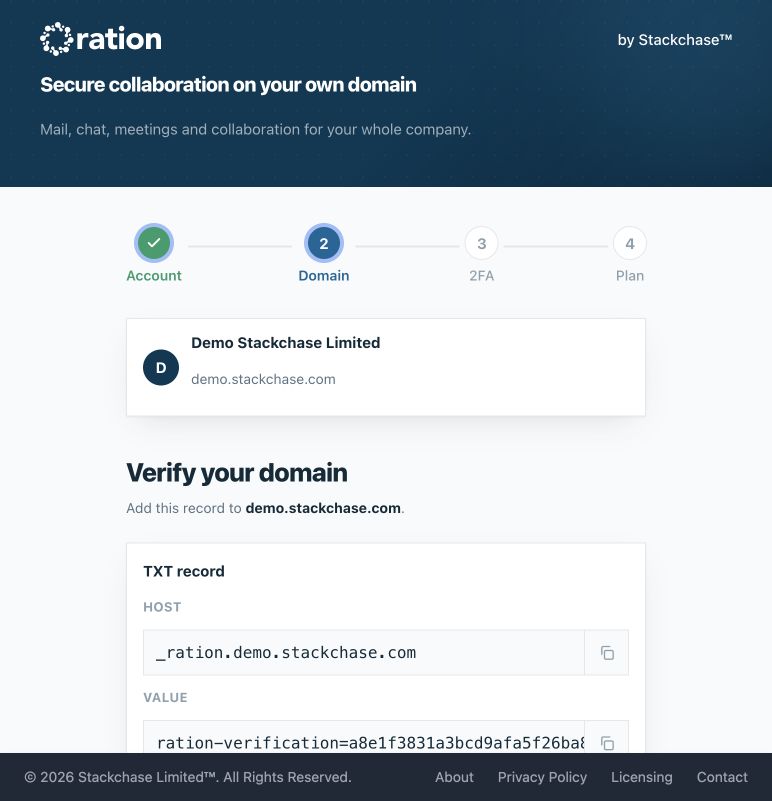
- Use the copy controls beside the host and value to avoid transcription errors.
- Show me where to add it includes provider-specific steps for GoDaddy, Cloudflare, Namecheap, Google Domains / Squarespace, and AWS Route 53, plus general guidance for other providers.
- If a TXT record is not possible, expand Can’t add a TXT record? and use the displayed CNAME alternative.
- DNS propagation can take 5–30 minutes. Save the record and check again if verification is not yet visible.
- Use Copy and share details with IT admin if another person manages the organisation’s DNS.
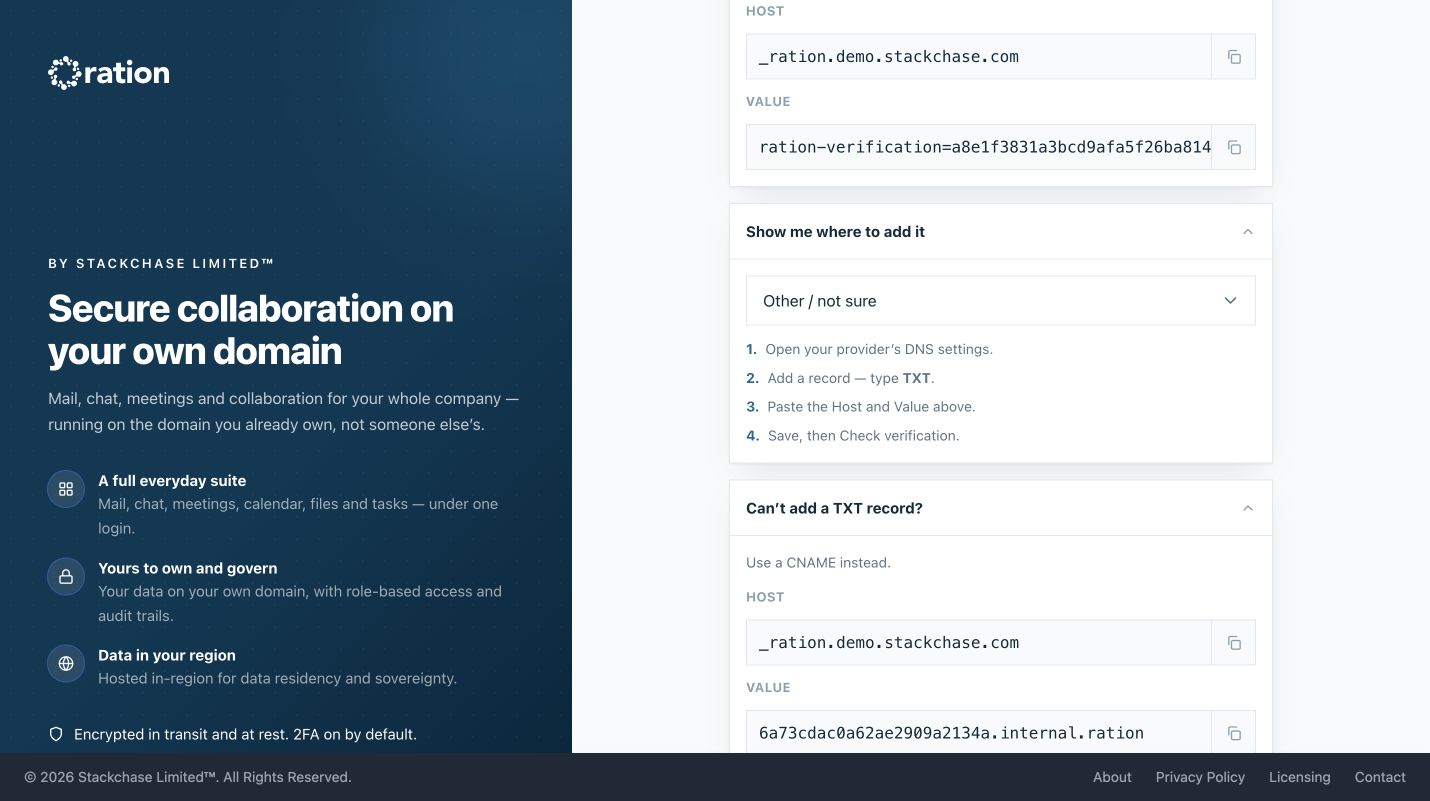
Do not advance until the domain is verified: this confirms that the organisation controls the domain it will use for Ration.
3. Set up 2FA and save backup codes
Registration requires two-factor authentication. Scan the displayed QR code with your chosen TOTP authenticator, enter its current six-digit code, then select Verify.
If scanning is unavailable, open Can’t scan? and add the displayed setup key manually. Keep the QR code and setup key private.
After verification, Ration generates and displays backup codes. Save them immediately in a secure location: they are shown only once and are needed if the authenticator is unavailable. Select Continue only after you have saved them; Ration then advances to Choose a plan.
For supported authenticator guidance, see Sign in with 2FA.
4. Select a plan and complete billing
Choose a plan, billing interval, and seat count. The live registration screen offers Ration Start, Ration Do, and Ration Scale, each in monthly or annual billing. Ration shows the unit price, subtotal, interval, optional trial period, and plan description before you continue.
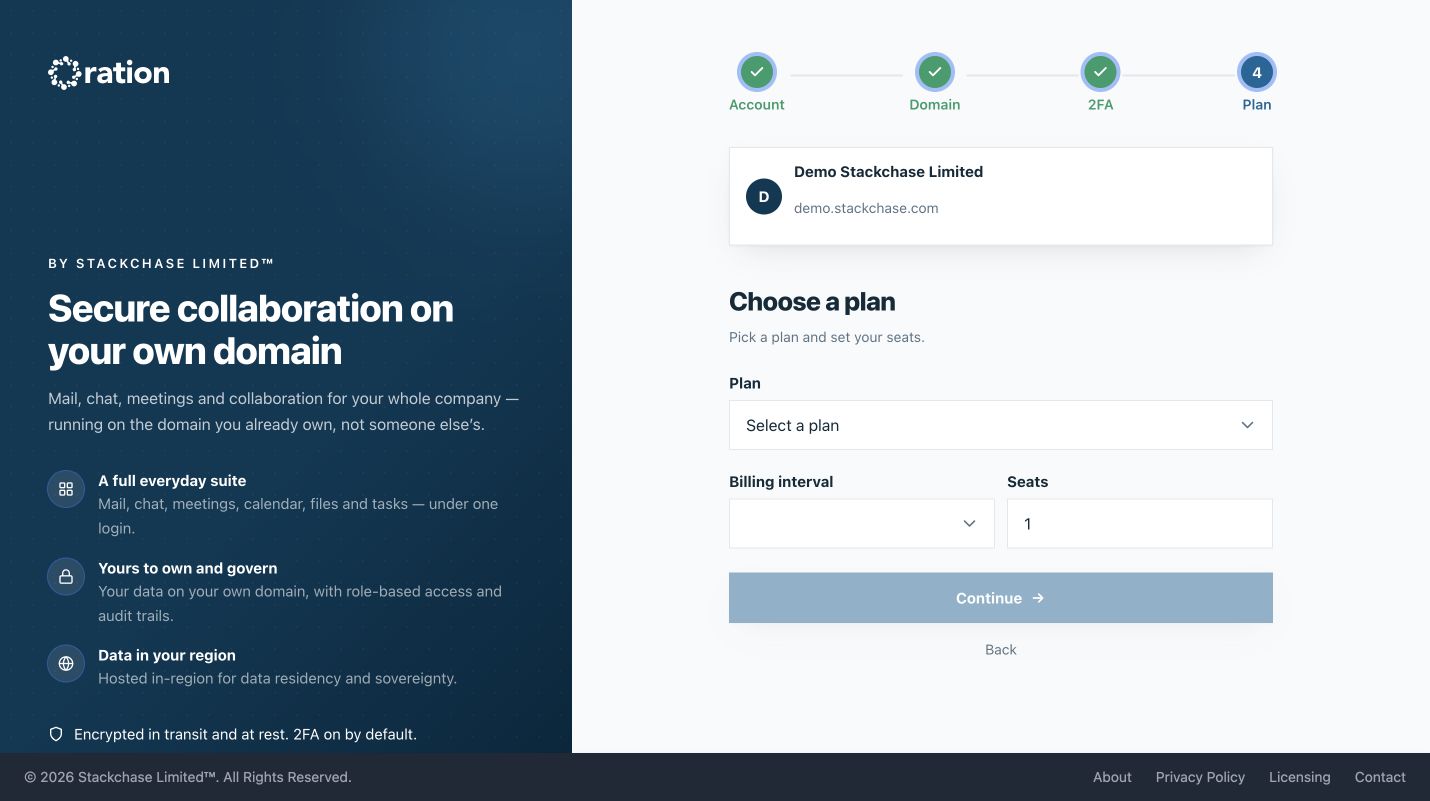
Provide billing contact name and email, company name if applicable, billing country and address, city, postal code, and optional Tax/VAT ID. Ration uses these details to create customer invoices. Enter a promo code if one was provided, then select the payment action to continue to secure payment.
You can update billing and invoice details later in Tenant Administration, so correct changes of address, billing contact, or Tax/VAT information there as soon as they occur.
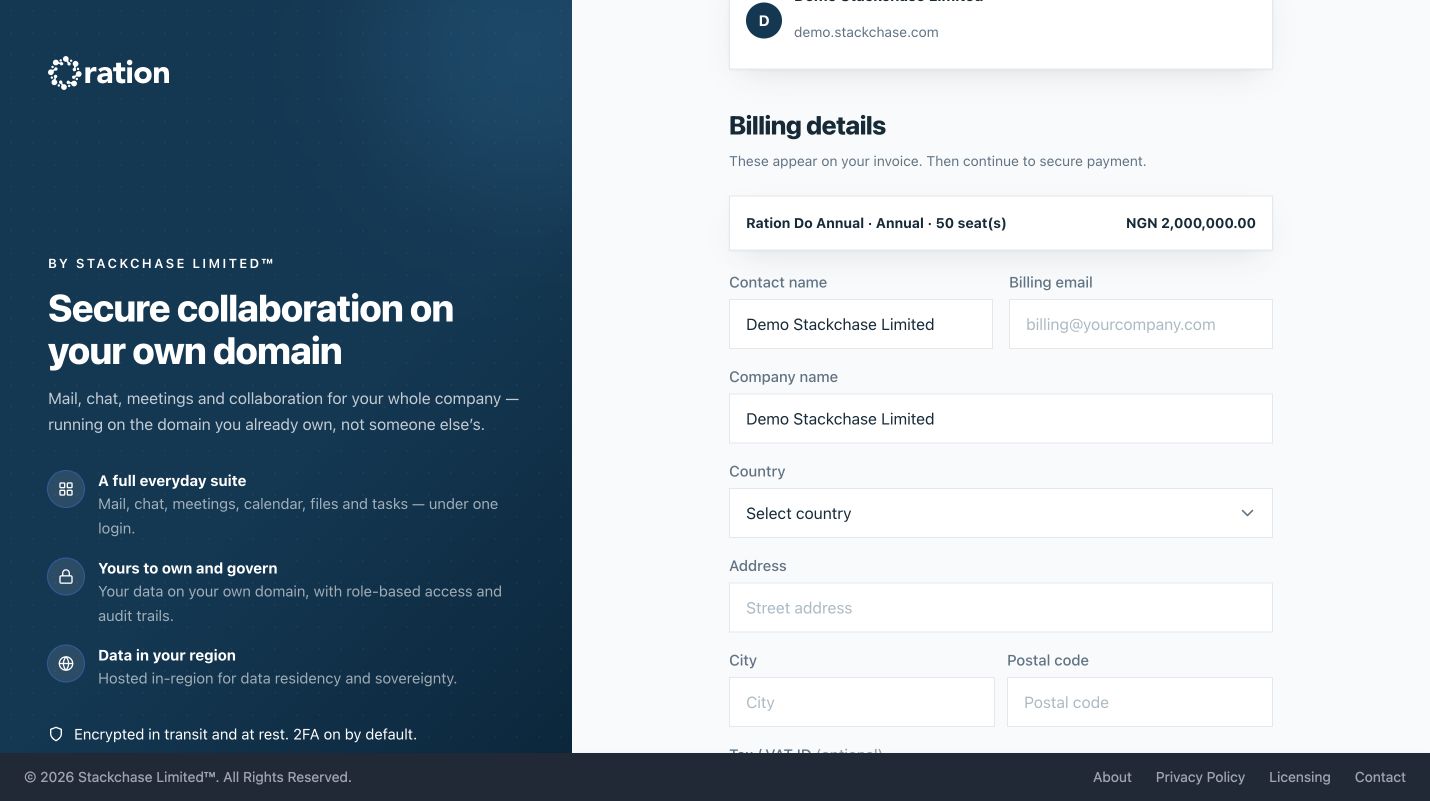
The customer can proceed with payment after submitting these details. If payment is not completed in the first session, Ration shows Payment pending with options to resume payment, confirm that payment has been completed, or change the plan. Once payment is confirmed, registration completes and Ration provisions the tenant. If billing is active but workspace provisioning is still running, the Activation pending screen lets you retry provisioning or contact support.
Finish and access the new organisation
When provisioning completes, Ration displays Your suite is ready and creates the first tenant user: the Tenant Admin. The administrator account uses the tenant-domain address account@<tenant-domain> and the initial password chosen in step 1. For example, a tenant using example.com signs in as account@example.com.
The Tenant Admin can log in at https://app.ration.works/admin to manage the tenant. Use Download details or Copy to retain the admin portal URL and administrator email, then select Open the admin portal to begin tenant administration.
The registration password and TOTP authenticator protect the first administrator account. Store backup codes securely and ensure the person completing registration is authorised to manage the organisation’s domain, billing, and administration.